| Garantie LCD / Backlight (Jahre): | 3 Jahre mit Pick-Up-Service |
| max. Pixelfehler (nach ISO 13406-2): | Klasse II |
| Panelgröße [Zoll] / Paneltechnologie: | 24,1 / P-IPS |
| Pixelgröße [mm]: | 0.270 |
| Standardauflösung: | 1.920 x 1.200 (16:10) |
| Sichtbare Bildgröße/-diagonale [mm]: | 518 x 324 / 611 |
| Eingänge, Stecker: | 1 x HDMI (digital), 1 x DVI-D (digital), 1 x Display-Port (digital), 1 x D-Sub VGA (analog), 1 x USB-Upstream, 2 x USB-Downstream, 1 x Kopfhörerausgang (Stereo, 3,5 mm Klinke), 7-in-1 Cardreader |
| Bildfrequenz [Hz]: | 50 – 76 |
| max. Zeilenfrequenz / Videobandbreite [kHz/MHz]: | 30 – 83 / – |
| Farbmodi Preset / User: | 5 / 1 |
| LCD drehbar / Portrait Modus: | Ja / Ja |
| LCD Display Arm Option: | Ja |
| Ausstattung: | Display-Port Kabel, DVI-D Kabel, USB-Upstream Kabel, Netzkabel, Treiber CD, Garantieheft, Kurzanleitung, Kalibrierungsreport, Kabelbinder |
| Monitormaße (B x H x T) [mm]: | 558 x 381 x 235 (mit Fuß) |
| Gewicht [kg]: | 7,3 (mit Fuß) |
| Prüfzeichen: | TCO‘03, RoHS, TUV-GS, TÜV-ERGO, CE, ISO9241-307, Windows 7 WHQL |
| Leistungsaufnahme On/Stand-by/Off [Watt]: | < 75 (max.) / < 1 / 0 (Herstellerangaben) |
Einleitung
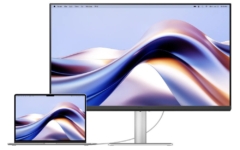
PA246Q nennt sich der neue und gegenwärtig noch einzige Monitor der ebenfalls noch neuen Pro-Art Modellreihe von Asus. Für den beruflichen Einsatz konzipiert, stehen insbesondere eine hohe Bildqualität und gute Ergonomie an vorderster Stelle. In Sachen Bildqualität vertraut Asus beim PA246Q auf die Stärken eines P-IPS Panel mit erweitertem Farbraum und 12-Bit LUT. Das 24 Zoll große Panel im 16:10 Bildformat bietet einen entsprechend großen Arbeitsplatz. Asus verspricht zudem dass der PA246Q bereits werkseitig sehr farbneutral ist mit DeltaE Abweichungen < 5.
Um nichts dem Zufall zu überlassen, bietet der Asus PA246Q noch zusätzlich eine 6-Achsen Farbkontrolle. Der ergonomische Standfuß erlaubt perfekte Einstellungen für jeden Anwender. Eine Vielzahl an Schnittstellen macht den Asus PA246Q auch bei den Anschlussmöglichkeiten sehr flexibel. Zumindest laut Datenblatt lässt der Asus PA246Q keine Wünsche offen. Im Laufe des Testverfahrens haben sich besonders hinsichtlich der Bildqualität nahezu identische Resultate zum DELL U2410 herausgestellt was die Vermutung nahelegt, dass Asus beim PA246Q nicht nur das identische Panle, sondern auch Teile der Dell Elektronik verbaut. Unser ausführliches Testprocedere wird Klarheit schaffen.
Für unseren Test haben wir den Asus PA246Q am digitalen DVI Ausgang einer Gainward GTX 560 angeschlossen und ihn über den DVI Eingang per DVI Kabel mit der Grafikkarte verbunden. Die farbmetrischen Messungen wurden mit einem Spektralfotometer (EyeOne Pro) in Verbindung mit der iColor Software von Quato und Colorimetre HCFR durchgeführt. Für die Ermittlung des minimalen Schwarzwertes wurde ein Colorimeter (X-Rite DTP94) verwendet. Als externe Zuspielquelle kam während des Tests der Sony BDP-S350 Blu-ray Player zum Einsatz, angeschlossen über ein HDMI Kabel.
Lieferumfang
Für einen 24 Zoll großen Monitor fällt die Verpackung des Asus PA246Q mit den Außenmaßen 67 x 45 x 29 Zentimeter (B x H x T) sehr voluminös aus. Eine Trageschlaufe mittig an der Oberseite platziert, macht den Transport aber dennoch sehr komfortabel. Zwei Styroporschalen fixieren den Asus PA246Q zuverlässig im Karton und trennen außerdem das Zubehör vom Monitor. Ein Schaumstoffbeutel schützt den Asus PA246Q noch zusätzlich. Der PA246Q wird in Pivot Stellung mit bereits montiertem Standfuß geliefert und ist somit nach Drehen des Displays sogleich einsatzbereit.
Fast vollständig präsentiert sich das Zubehör des Asus PA246Q, denn bis auf ein HDMI Kabel werden alle benötigten Utensilien mitgeliefert. Neben den Anschlusskabeln befindet sich noch eine Treiber-CD, Kurzanleitung, Garantieheft, Kabelbinder-Klettband sowie ein Kalibrierungsreport im Lieferumfang.

Optik und Mechanik
Der Asus PA246Q präsentiert sich in einem schwarzmatten Kunststoffgehäuse mit angerauter Oberfläche. Um den beruflichen Einsatz zu unterstreichen finden sich überall Skalierungen und Leistungsdaten, sowohl am Displayrahmen wie auch Standfuß. Ein roter Streifen am unteren Gehäuserahmen vermittelt sportliche Dynamik und ist ein gekonnt platziertes Designelement.

Ein sehr schmaler Rahmen von nur 1,9 Zentimeter erlaubt komfortablen Mehrschirmbetrieb. Auf dem Displayrahmen befinden sich die Bezeichnung der Modellreihe, ein Hinweis darüber dass der Asus PA246Q einen Display-Port Anschluss besitzt sowie das Herstellerlogo.

Der Asus PA246Q lässt sich in der Höhe von minimal 4 Zentimeter auf maximal 14 Zentimeter stufenlos und leichtgängig einstellen.


Horizontal ist eine Drehung um 60 Grad, jeweils nach links und rechts möglich. Der Standfußteller dreht sich dabei nicht mit.


Ebenso mit an Board ist die Pivot-Funktion. In dieser Stellung ist immer noch eine Änderung der Höhe um etwa 4 Zentimeter möglich, lässt sich aber nicht mehr so leichtgängig verändern. Das Display kann um etwa einen halben Zentimeter überdreht werden sodass der Asus PA246Q auch auf schiefem Untergrund gerade stehen kann. Einen entsprechenden Spielraum zur Nachjustierung bietet der PA246Q auch in der normal üblichen horizontalen Ausrichtung.

Neigen lässt sich der Asus PA246Q um etwa 5 Grad nach vorne und bis zu 20 Grad nach hinten. Die Veränderung der Neigung benötigt einen gut dosierbaren Kraftaufwand, ist weder zu leicht- noch zu schwergängig.


Rückseitig betrachtet gibt es am Asus PA246Q kein optisch sonderlich auffallendes Merkmal. An einen Strohhalm geklammert, kann höchstens der Herstellerschriftzug erwähnt werden, welcher sich wegen der schwarz glänzenden Oberfläche ein wenig vom ansonsten einheitlich schwarzmatten Gehäuse abhebt.

Der stabile und sehr ergonomische Standfuß des Asus PA246Q spielt alle Vorzüge aus und lässt keine Wünsche offen. Er gibt dem Display einen sicheren Stand, federt Vibrationen gut ab und benötigt mit einer Grundfläche von 28 x 23,5 Zentimeter nicht sonderlich viel Platz auf dem Schreibtisch.


Für alternative Befestigungsmöglichkeiten bietet der Asus PA246Q den VESA 100 Standard, den auch der originale Standfuß verwendet.

Optisch kaum sichtbar sind die Belüftungsöffnungen des Asus PA246Q. Ein quadratisches Muster überzieht die äußeren Ränder der Rückseite und nicht jedes Quadrat dient als Lüftungsöffnung.
Der Asus PA246Q wird in Betrieb mit der Zeit recht warm und auch wenn nicht allzu üppige Belüftungsöffnungen vorhanden sind, wird die Abwärme ausreichend gut abgeleitet. Kleinere Öffnungen haben umgekehrt den Vorteil dass von Außen weniger Gefahr besteht dass Staub und Schmutz eindringen kann.

Der Asus PA246Q vermittelt den Eindruck einer sehr soliden Verarbeitung. Das robuste Gehäuse knackt nicht, Spaltmaße sind gleichmäßig und es gibt keine scharfen Kanten. Allerdings arbeitet unser Testgerät nicht ganz lautlos. Ab einer Helligkeit von etwa 85 Prozent und niedriger ist ein niederfrequentes Summen zu vernehmen und kann bei Überempfindlichkeit durchaus als störend empfunden werden. Bekanntlich unterliegt die Geräuschentwicklung aber einer gewissen Serienstreuung und wird nicht von jedem Menschen gleich empfunden.
![]()


